Open Products
From Seller Dashboard, choose Products → Add new product.
Add the listing details
Enter a recognizable Title, choose Product Type, and set the Price. Select the closest Category and use Upload a product cover image for your main photo. Add the short and full descriptions below.
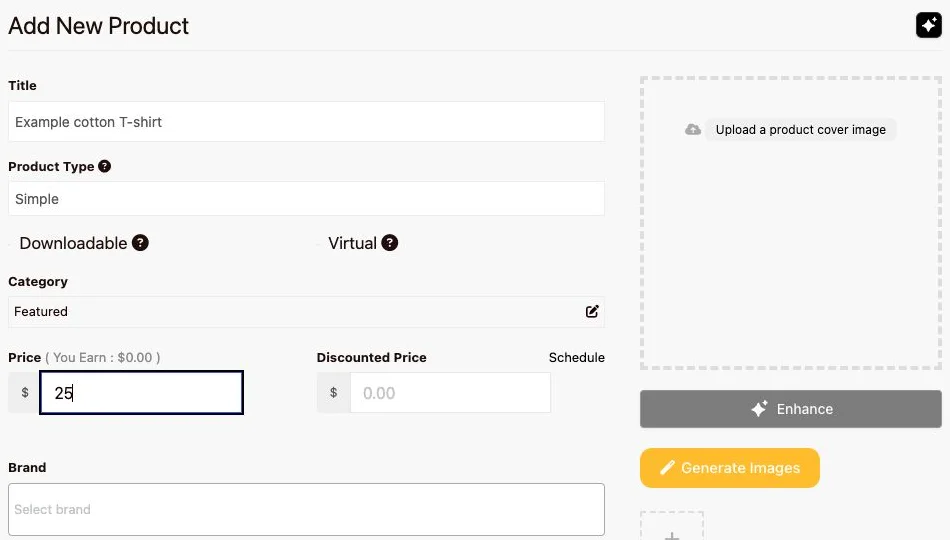
Example only: replace the title, price, category, and image with your own product details.
Choose inventory and fulfillment
Expand Inventory and check Enable product stock management when quantity is limited. Enter a Stock quantity, a Low stock threshold, and your Allow Backorders choice. A SKU is your own identifier for the item.
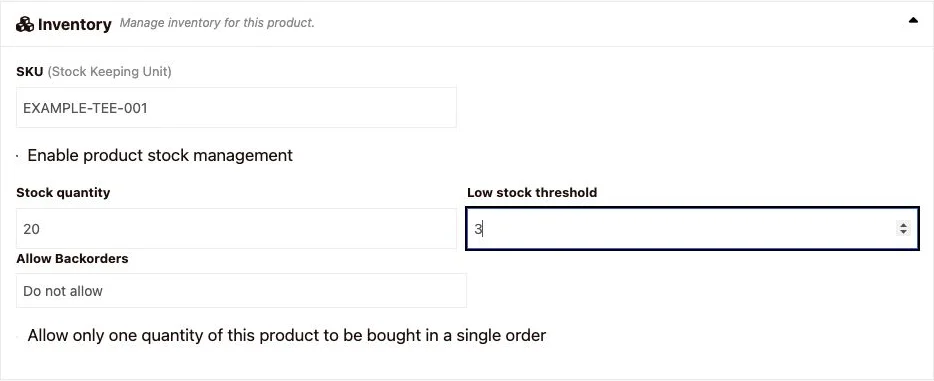
The example starts with 20 items and a low-stock threshold of 3. Do not copy these numbers unless they match your stock.
For physical products, complete the Koopo Shipping packaging and weight steps. See Configure Koopo Shipping. Use Downloadable, Virtual, or the appropriate product type only when it matches what you are selling.
Review before publishing
Under Other Options, review Product Status before pressing Save Product. Choose Draft for unfinished work; the captured editor initially selected Publish. Review price, stock, images, variations, shipping, and seller ownership before publishing.
Captured on the local website on September 16, 2026, using fictional inputs. No product was published. Live-site and mobile layouts may differ.