Configure ticket choices
Open Seller Dashboard → Tickets, select your event, then choose New Ticket Type. If you still need an event, the dashboard provides Add New Event.
In Basics, enter Ticket Name, Price, and Capacity. Set Max per order if you want to limit a single purchase. Use clear names such as General Admission or Early Entry.
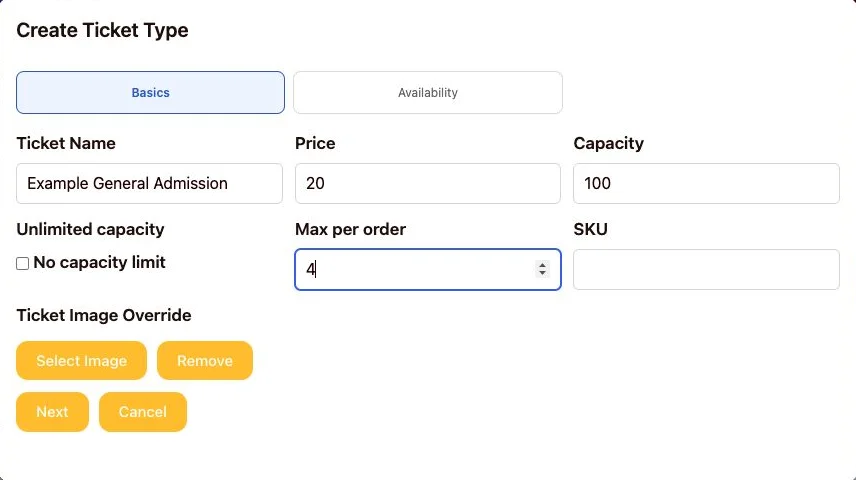
Fictional example: 100 available tickets, priced at 20 each, with a maximum of 4 per order. No tickets were created.
Set limits and timing
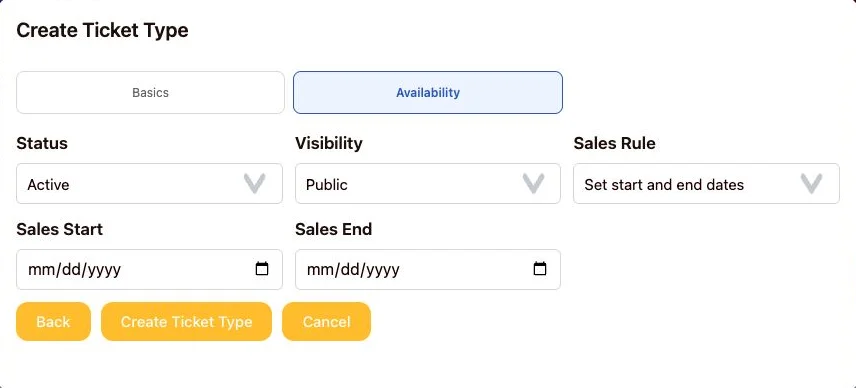
Choose Next to open Availability. Review Status, Visibility, and Sales Rule. The sales rule can stop sales when the event starts, when it ends, or use dates you choose.
Select Set start and end dates to reveal Sales Start and Sales End. Check these against your event dates before selecting Create Ticket Type. Use Back to revise the basics or Cancel to leave without creating the ticket type.
Watch the two-step setup
A silent, 12-second visual walkthrough assembled from actual local screen captures—not a real-time recording. It shows Basics, Availability, and the optional sales-date fields. It stops before creating a ticket.
Review sold tickets
After selecting an event, use Existing Ticket Types and its Search, Status, and Visibility filters to find ticket types. Ticket Check-In provides separate Verify, Redeem, and Scan QR with Camera controls. Redeeming a ticket is an operational action; do not use real attendee tickets for practice.
Captured on the local website on September 16, 2026. Account details, sales totals, attendee information, and ticket codes are excluded. Live-site and mobile layouts may differ.
Keep purchase status separate
An event being published does not mean ticket checkout has been payment-tested. A generated ticket does not by itself prove that settlement or a bank payout completed.